It's time to water the plants!
I decided to build a simple moisture sensor that will help me remember to water my plants.
I was feeling inspired after reading about Luke Iseman's cool Garduino project on MAKE magazine. It basically gives his in-house garden a life-support system which keeps moisture and light at the right levels.
Well, I wasn't inspired enough to build a complete system like he did, but I found it amusing that we could use large construction nails for something as delicate as catering for a plant using electronics...
So I made a moisture indicator using Arduino, and it even works!
Once an hour it samples the moisture in my plants' soil. Then it lets me know whether it's moist enough (Green LED on) and when it's time to water them (surprise -- Red LED on).
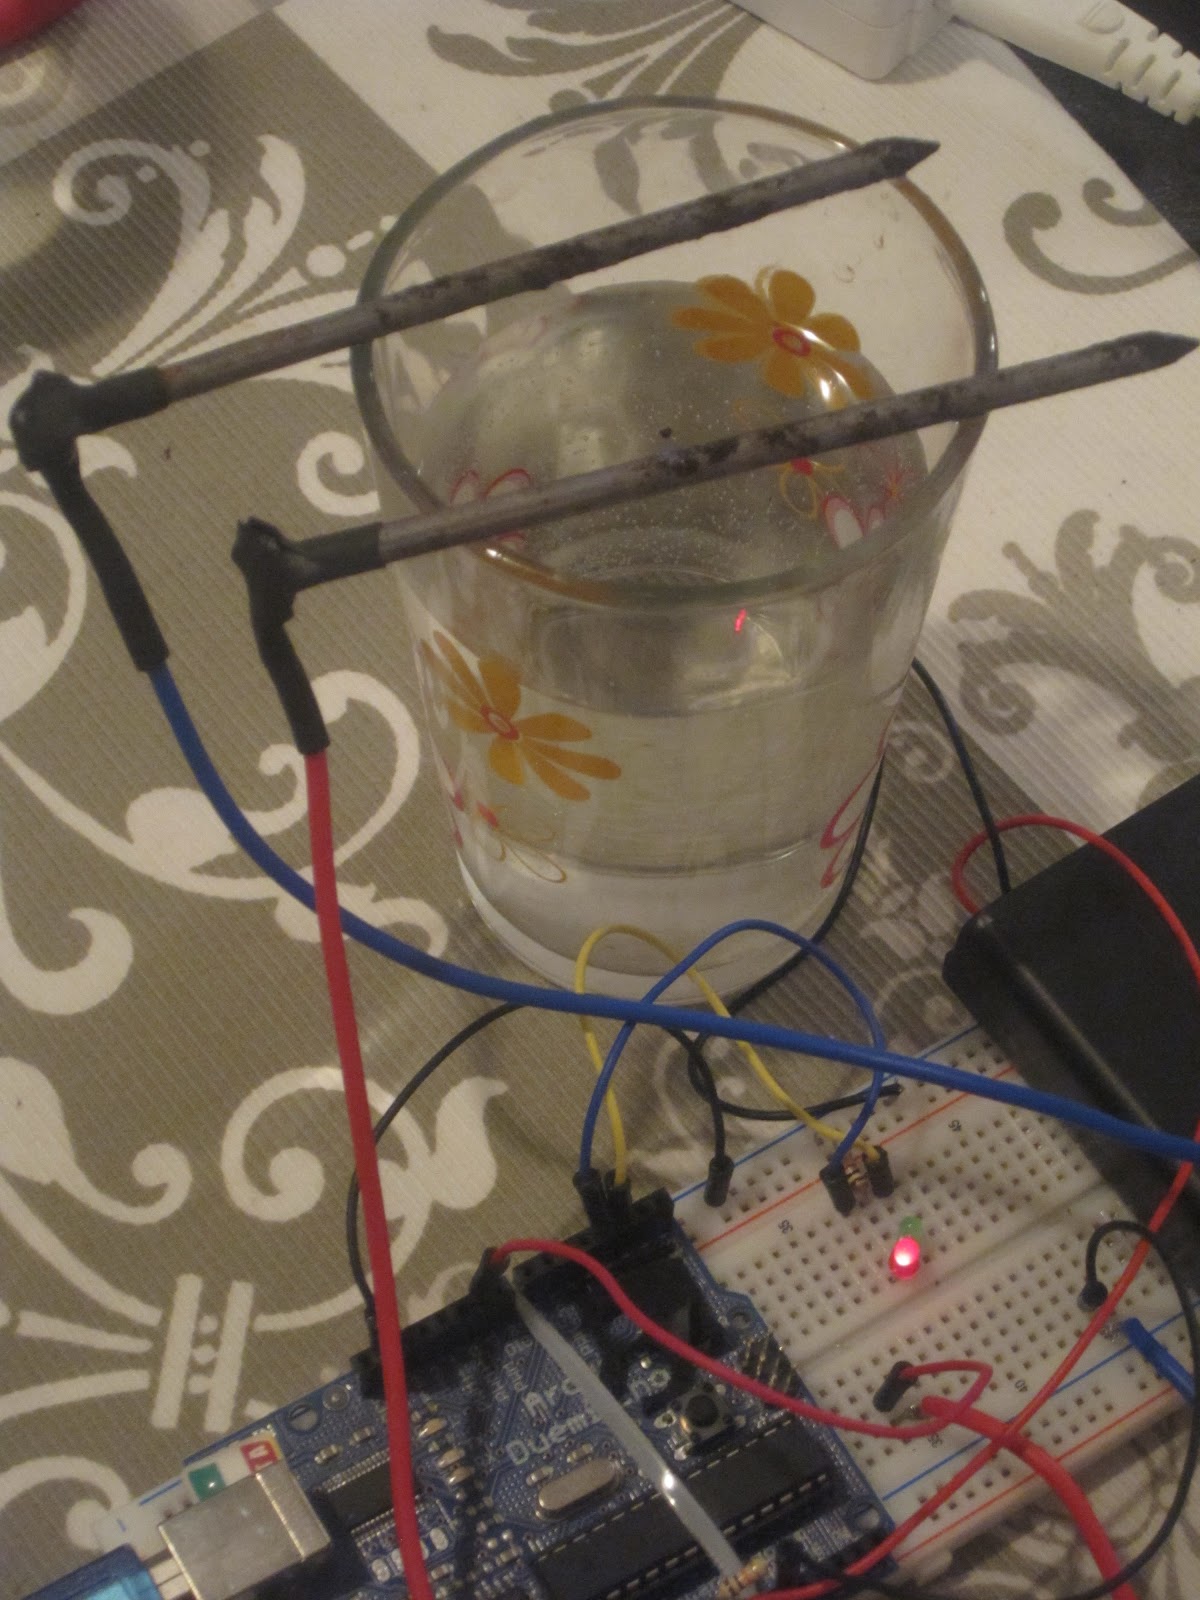
A little piece of advice I got from smart people on the Gardiuno project talkback: passing direct current through nails in this environment would make them oxidize and corrode fast.
Using galvanized nails and replacing DC for AC would slow down this process. In this cacse I chose galvanized nails and additionally made sure current only passes through them momentarily every hour.
In the pictures below you can see the nails started corroding already. I hope it's because I made all the experiments with them before finalizing the device...
All in all - nothing fancy here, but this little device is both useful and simple. And these are excellent properties for a project.
 |
| Green light = moist enough! |
 |
| Red light = time to water! |
 |
| Simple, useful and fun! |
Where to go from here? There's plenty of room for improvements:
For
starters, I could change these nails... the ones seen in the photos were abused and started corroding.
Then, there's the fun of making this device actually water the plants for me if I neglect doing that on time.
Next
stage would be to replace the almighty, but expensive, Arduino with a
PIC to do the same job for a fraction of the price and space, freeing up
the Arduino for future projects.
Thanks for reading!
L10R
Thanks for reading!
L10R


